Remote access to your PC using ZeroTier
Installing the Windows client
Download the Windows installer package "ZeroTier One.msi" from https://zerotier.com/download.shtml. Windows 7 or later are supported. We will be doing this on Windows 10, as the steps are the same.
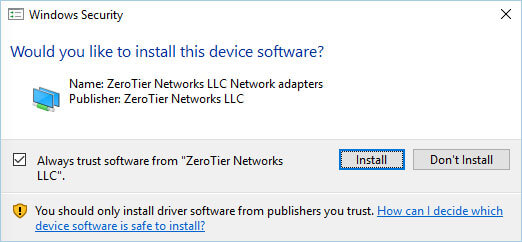
Install the package and click "Install" when prompted to install the device software.
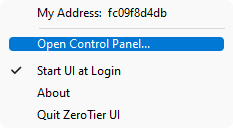
When you launch the ZeroTier app you should see the app icon in the bottom-right status bar.

Click this and choose "Open Control Panel...".
-
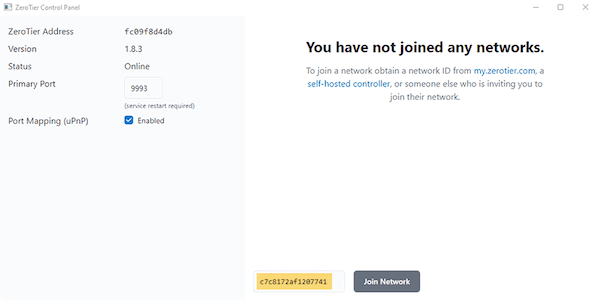
In the bottom of the popup window, paste or enter the Network ID of your network and click 'Join Network'.

If you are using Windows 11 continue to step 6.
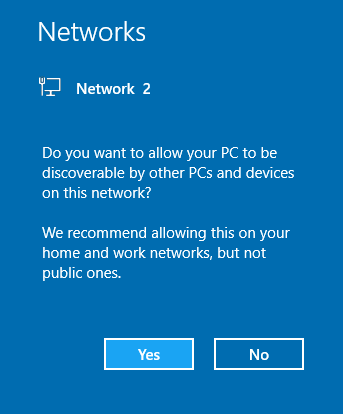
Windows 10 pops up the following warning. Click 'Yes' if you are installing this on your home or work PC.
If you are using Windows 7 select Home or Work as appropriate.
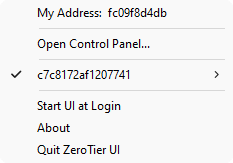
If you now click the ZeroTier icon, you should see a tick next to the network ID. This means that it is trying to connect but hasn't yet been authorized. To do this we need to go to the web UI where we created the network.
Refresh the Zerotier Networks browser page and scroll right to the bottom. The list of devices that are either active on the network or are wanting to connect are shown here.
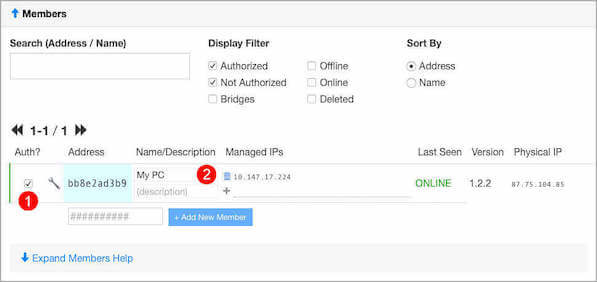
The 'Address' of the new device is the same as the "Node ID" shown in the ZeroTier Windows app menu, so we know that this is my PC trying to connect. To authorize it, simply tick the box on the left-hand side (1). Filling in the Short Name field (2) will help you keep track of all your devices. I've called this "My PC", and ZeroTier has assigned the IP address 10.147.17.224 to it. This IP address is only accessible by other devices connected to your ZeroTier network. Nobody else will be able to access this from the Internet. We will use this IP address in FileBrowser later to connect to this computer.
That's it. We're connected. From the ZeroTier client app "Preferences..." menu item you can enable "Start ZeroTier One on system startup" to save you having to find the app each time you need it.
- 1 - Create a ZeroTier account & network
- 2 - Install the ZeroTier Mac or PC app
- 3 - Install the ZeroTier VPN app on iPhone/iPad
- 4 - Configure FileBrowser to connect

Do you Have a Synology NAS?
If you are Trying to Connect to your Synology via a VPN, you can connect using Synology's OpenVPN server package. View our guide here.
